postcss 를 사용해 hugo 테마에 tailwindcss 적용하기
Apply tailwindcss in an easy way by utilizing the functions provided by hugo.
// INDEX
hugo 로 블로그를 만들고 테마와 컨텐츠를 관리하고 있다.
hugo 의 pipe 기능과 postcss 를 이용해서 hugo 테마에 tailwindcss 를 적용하고, 개발 환경과 운영 환경에 맞게 css 파일을 빌드할 수 있도록 적용해보자.
필요 라이브러리 구성
테마에 관련된 디렉토리는 site/themes 하위에 존재한다.
사용하는 테마의 디렉토리로 이동하자.
cd themes/soyhengetailwindcss 설정에 필요한 라이브러리와 의존성은 npm 으로 관리하자.
npm 사용을 위해선 npm 이 설치되어 있어야 하며 node 를 설치하면 된다.
npm init -y명령어를 실행하면 package.json 파일이 생성된다.
필요한 의존성을 다운받는다.
npm install --save-dev autoprefixer postcss postcss-cli tailwindcss @tailwindcss/aspect-ratio @tailwindcss/forms @tailwindcss/typography각각의 라이브러리의 사용 목적은 다음과 같다.
autoprefixer: 브라우저 호환성을 위해 CS S에 -webkit-, -moz- 등의 접두사를 자동으로 추가하는 플러그인.postcss: 플러그인을 사용하여 CSS 를 변환하는 도구.postcss-cli: 커맨드 라인에서 PostCSS 를 사용하기 위한 도구.tailwindcss: 유틸리티 기반의 프론트엔드 CSS 프레임워크.@tailwindcss/aspect-ratio: TailwindCSS 로 이미지 비율을 설정하기 위한 플러그인.@tailwindcss/forms: TailwindCSS 로 폼 스타일을 설정하기 위한 플러그인.@tailwindcss/typography: TailwindCSS 로 폰트 및 마크다운 스타일링을 위한 플러그인.
package.json 을 확인하면 다음과 같이 개발 의존성에 라이브러리와 플러그인이 추가되어 있을것이다.
버전 정보는 다를 수 있다.
# package.json
...
"devDependencies": {
  "@tailwindcss/aspect-ratio": "^0.4.x",
  "@tailwindcss/forms": "^0.5.x",
  "@tailwindcss/typography": "^0.5.x",
  "autoprefixer": "^10.x.x",
  "postcss": "^8.x.x",
  "postcss-cli": "^11.0.0",
  "tailwindcss": "^3.4.x"
}
autoprefixer 의 사용 가능한 브라우저 밴더에 대한 접두사 설정을 위해 browserslist 에 대한 내용도 추가하자.
# package.json
...
"devDependencies": {
  ...
},
"browserslist": [
  "last 1 version",
  "> 1%",
  "maintained node versions",
  "not dead"
],
tailwindcss & postcss 사용을 위한 구성 설정
assets 디렉토리는 hugo 에서 전역적으로 사용하는 resource 를 저장하는 디렉토리이다. 주로 이미지, css, js 등의 정적 파일을 저장하는 디렉토리이다. assets 하위에 디렉토리를 만들자.
mkdir -p assets/css && touch tailwindcss.config.js postcss.config.js styles.css각 파일에 들어갈 내용은 다음과 같다.
postcss configuration
// postcss.config.js
const themeDir = __dirname + '/../../';
module.exports = {
    plugins: [
    require('tailwindcss')(themeDir + 'assets/css/tailwind.config.js'),
    require('autoprefixer')({
        path: [themeDir]
        })
    ]
}
themeDir 이라는 변수는 현재 파일의 디렉토리 상위 2단계 위 디렉토리를 나타낸다.
my-theme/assets/css/postcss.config.js 기준 2단계 상위 디렉토리는 테마 디렉토리의 루트 디렉토리가 themeDir 이 된다.
postcss.config.js 의 설정은 postcss 에서 사용할 plugin 에 대한 설정이다.
tailwindcss를 이용해 tailwindcss 형식의 css 를 브라우저가 이해할 수 있는 css 파일로 변환한다. tailwindcss 구성 파일 경로를 포함한다.autoprefixer를 이용해 브라우저 호환성을 위한 접두사를 추가한다. 앞서 설정한browserslist를 찾기 위한 path 설정을 포함한다.
tailwindcss configuration
// tailwindcss.config.js
module.exports = {
    variants: {},
    content: [
      "./themes/**/layouts/*.html",
      "./themes/**/layouts/partials/**/*.html",
      "./themes/**/layouts/**/*.html",
      "./layouts/*.html",
      "./layouts/**/*.html",
    ],
    theme: {
        extend: {},
    },
    plugins: [
        require('@tailwindcss/aspect-ratio'),
        require('@tailwindcss/forms'),
        require('@tailwindcss/typography'),
    ]
}
tailwindcss.config.js 의 설정은 tailwindcss 를 사용하기 위한 설정이다.
tailwindcss 를 사용할 content 경로와, 앞서 설치한 plugin 을 정의하고 다른 항목은 기본값으로 충분하다.
styles css
/* styles.css */
@tailwind base;
@tailwind components;
@tailwind utilities;
@tailwind variants;
styles.css 에선 사용할 tailwindcss 의 지시어를 선언한다.
해당 파일을 읽어 postcss 가 브라우저가 이해 가능한 css 파일로 변환해 줄 것이다.
hugo pipe 와 html template
hugo 는 여러 html 파일을 레고처럼 조립해서 하나의 html 파일을 만들 수 있다. 이는 go 의 text/template 과 html/template 패키지를 사용하기 때문이다. go 의 template 문법을 사용하면 조립 가능한 레고 블록인 template 을 쉽게 만들 수 있다.
hugo 에서 layouts 디렉토리는 템플릿을 포함하는 디렉토리이다.
layouts/_default 와 layouts/partials 에 조립에 필요한 template 파일을 저장하는 기본적인 경로로 사용한다.
_default- 웹 사이트의 페이지마다 가장 기본이 되는 템플릿을 작성해두는 폴더.
- baseof.html, list.html, single.html, taxonomy.html 등이 있다.
partials- 레이아웃의 어디서나 사용 가능한 작은 부품이 되는 템플릿을 선언하는 폴더.
- 예를들어 head 태그 내의 meta 태그를 위한 meta.html, 네비게이션을 위한 nav.html 등을 선언하고 다른 템플릿에서 사용할 수 있다.
_default 디렉토리의 baseof.html 은 hugo 가 정적 페이지를 생성할 때 사용하는 가장 밑바탕이 되는 템플릿이다.
일반적으로 html 태그, head 와 body 태그를 선언한다.
layouts/_default/baseof.html
<!DOCTYPE html>
<html lang="{{ .Site.LanguageCode }}">
    {{- partial "head.html" . -}}

    <body>
        <main>
            {{- block "main" . -}}{{- end -}}
        </main>
    </body>
</html>
Go 에서 템플릿 변환 시 치환하거나 처리가 필요한 부분이라고 명시적으로 작성하는 방법은 중괄호 두개 사이에 템플릿 문법을 작성하는 것이다. Go 의 템플릿 문법과 그것을 확장한 Hugo 의 템플릿 문법은 다양한 기능을 지원한다. 여기서는 템플릿 문법이라고 표현할것이다.
더 자세한 사용법을 알아보기 위해선 template api 문서 와 hugo 공식 페이지에서 확인해보자.
사용한 템플릿 문법에대한 간단한 설명은 다음과 같다.
{{ .Site.LanguageCode }}: hugo 전역에서 접근 가능한 site object 의 language code 값을 html 태그의 lang attribute 로 설정한다.partial: partials.Include 함수의 alias 인 partial 은 hugo 의 확장 문법으로 부분적으로 선언된 템플릿의 결과를 가지고온다. 기본적으로 rendering output 을 반환한다.- hugo 의 모든 partials 는
layouts/partials디렉토리에 저장되어야 하며, partials 하위에 디렉토리 구조로 관리할 수 있다.
- hugo 의 모든 partials 는
. (dot): 현재 컨텍스트를 의미한다. 컨텍스트란 각각의 템플릿에 전달되는 데이터이다.{{- , -}}: 이전 내용의 공백 제거, 이후에 오는 내용의 공백을 제거를 한다. 불필요한 whitespace 를 줄일 수 있다.block: end 와 함께 사용하며,block에 선언된 내용을 기본으로 사용하며, 동일한 이름 (위에선 main) 으로 선언된 define 구문이 있다면 해당 부분으로 내용이 대체된다.- main 하위에 올 수 있는 내용은 다양하기 때문에 partial, template 과 같은 고정된 템플릿 형태가 아닌 대체될 수 있는 block 으로 설정했다.
layouts/partials/head.html
<head>
    <meta charset="utf-8" />
    <meta name="viewport"
          content="width=device-width, user-scalable=no, initial-scale=1.0, maximum-scale=1.0, minimum-scale=1.0">
    <title>{{- .Site.Title -}}</title>

    {{- if .Description }}
        <meta name="description" content="{{ .Description }}" />
    {{ end -}}

    {{ partialCached "css.html" . }}
</head>
head 태그 부분만 똑 떼서 작성한 것으로 해당 부분이 그대로 baseof.html 의 {{- partial “head” . -}} 부분으로 치환된다.
각 페이지의 head 부분에 대해서 baseof.html 과 따로 관리를 위해 partial 로 선언한다.
이렇게 여러 부품으로 분할된 html 템플릿을 하나로 조립하여 정적 사이트로 생성해주는 것이 hugo 의 기능이다.
여기서 사용된 템플릿 문법은 다음과 같다.
.Site.Title: 전역에서 접근할 수 있는 site object 에서 title 변수를 가지고 온다.- hugo.toml 혹은 config.toml 에 선언한 title 을 기본으로 사용한다. 참고
if: end 와 같이 사용되며 조건 처리를 하는 경우에 사용된다. 위의 경우 content 의front matter에 description 이 있는 경우 description 을 meta 태그로 사용해 seo 최적화에 도움이 될 수 있다.partialCached:partials.IncludeCached 의 alias 인 partialCached 는 페이지가 요청될 때 마다 다시 값을 요청할 필요가 없는partial대해 캐싱을 허용하는 hugo 문법이다.- 위의 경우 partials 폴더에 선언된 css.html 을 부분 캐싱 한다는 의미이다. 참고
layouts/partials/css.html
{{- $styles := resources.Get "css/styles.css" | postCSS (dict "config" "./assets/css/postcss.config.js") -}}

{{ printf $styles }}
{{- if hugo.IsServer }}
    {{ $styles = $styles | resources.ExecuteAsTemplate (printf "css/styles.%v.css" now.UnixMilli) . }}
    <link rel="stylesheet" href="{{ $styles.RelPermalink }}">
{{ else }}
    {{ $styles = $styles | minify | fingerprint | resources.PostProcess }}
    <link rel="stylesheet" href="{{ $styles.RelPermalink }}" integrity="{{ $styles.Data.Integrity}}">
{{ end -}}
css.html 은 postcss 기능을 사용하여 tailwindcss 지시어를 css 로 변환하기 위해 가장 핵심적인 부분이다. \ css 파일을 동적으로 처리해서 개발 환경과 배포 환경에서 각각 다른 방식으로 css 파일을 처리한다.
전체적인 흐름은 다음과 같다.
1. css 파일 가지고 오기
{{- $styles := resources.Get "css/styles.css" | postCSS (dict "config" "./assets/css/postcss.config.js") -}}$styles: 변수를 선언하는 템플릿 문법이다. 여기선$styles라는 변수명으로 선언했다.resources.Get "css/styles.css":resources.Get함수는 지정된 경로에서 전역으로 사용 가능한 리소스 파일을 가지고 온다.- 리소스는 기본적으로 assets 디렉토리에서 가지고 온다. 앞서 만든 tailwindcss 의 지시어가 작성된
css/styles.css파일을 상대 경로로 지정한다.
- 리소스는 기본적으로 assets 디렉토리에서 가지고 온다. 앞서 만든 tailwindcss 의 지시어가 작성된
|: hugo 의 |(pipe) 는 assets 의 resource 를 처리할 수 있는 기능을 하는 모음이다.- pipe 함수를 파이프 이후에 작성하여 assets 에 대해 연속적인 처리가 가능하다.
- 다양한 파이프 함수에 대해서 확인해 볼 수 있다. 참고
postCSS (dict "config" "./assets/css/postcss.config.js"):postCSS함수는 hugo 에서 지원하는 pipe 함수로 PostCSS 를 사용하여 CSS 파일을 처리를 도와준다.- 여기서는
dict함수를 사용해 config 라는 key 값에 PostCSS 설정 파일(postcss.config.js) 의 경로로 지정한 map 을 만들어 postCSS 함수의 옵션으로 전달한다. 참고
- 여기서는
2. 개발 모드에서 css 파일 처리
{{- if hugo.IsServer }}
    {{ $styles = $styles | resources.ExecuteAsTemplate (printf "css/styles.%v.css" now.UnixMilli) . }}
    <link rel="stylesheet" href="{{ $styles.RelPermalink }}">
{{ else }}
앞서 선언한 $styles 변수에는 postCSS 가 실행된 css 파일이 resources 의 형태로 할당되어 있을것이다. assets 의 resources 를 처리하기 위해 파이프를 사용해서 처리한다.
if hugo.IsServer:hugo.IsServer는 현재 Hugo 가 개발 서버 모드에서 실행되고 있는지를 확인하는 조건문이다. 참고{{ $styles = $styles | resources.ExecuteAsTemplate (printf "css/styles.%v.css" now.UnixMilli) . }}resources.ExecuteAsTemplate함수는 리소스를 반환하며, 주어진 컨텍스트로 구문 분석하고 실행한 후 대상 경로를 캐시 키로 사용하여 결과를 캐싱한다.printf "css/styles.%v.css" now.UnixMilli는 printf 로 target path 를 문자열로 제공하기 위한 함수를 사용하며, 현재 시간을 밀리초 단위로 포함하는 파일 이름을 생성하여 개발 서버의 캐시를 방지한다.
<link rel="stylesheet" href="{{ $styles.RelPermalink }}">: 처리된 스타일시트를 HTML에 링크한다. $styles 변수엔 처리된 css 가 resources 타입으로 있으며RelPermalink로 링크 경로를 참조할 수 있다.
3. 운영 모드에서 css 파일 처리
{{ $styles = $styles | minify | fingerprint | resources.PostProcess }}
	<link rel="stylesheet" href="{{ $styles.RelPermalink }}" integrity="{{ $styles.Data.Integrity}}">
{{ end -}}
운영 모드에선 개발 서버와 다르게 계속해서 파일을 업데이트 할 필요가 없다. 따라서, 최소화 된 파일로 변환한다. 여기서도 resources 의 처리를 위해 pipe 함수를 사용한다.
{{ $styles = $styles | minify | fingerprint | resources.PostProcess }}: assets 의 resources 를 처리하기 위한 pipe 함수를 사용해 운영 환경의 css 파일을 처리한다.minify: 스타일시트를 압축하여 파일 크기를 줄인다.fingerprint: 파일의 무결성을 확인하기 위해 해시를 생성하고 파일 이름에 해시를 추가한다.resources.PostProcess: 빌드 후 리소스를 변환할 수 있도록 지연시켜준다.
<link rel="stylesheet" href="{{ $styles.RelPermalink }}" integrity="{{ $styles.Data.Integrity}}">: 처리된 스타일시트를 HTML에 링크한다.integrity속성은 해시를 포함하여 파일의 무결성을 검증할 수 있게 도와준다.
운영모드와 개발모드의 스타일시트의 링크는 다음과 같은 차이를 볼 수 있다.
운영 모드

개발 모드

tailwindcss 를 theme 에 적용하기
tailwindcss 사용을 위한 준비는 끝났다. 이제 사용해보자.
layouts/_default/baseof.html
<!DOCTYPE html>
<html lang="{{ .Site.LanguageCode }}">
    {{- partial "head" . -}}

    <body class="flex flex-col min-h-screen bg-slate-500 text-slate-50Í ">
        <main class="flex-1 grow mx-auto w-screen max-w-screen-2xl px-6 pt-4">
            {{- block "main" . -}}{{- end -}}
        </main>
    </body>
</html>
layouts/index.html
{{ define "main" }}
    <article class="justify-self-center mx-auto text-center ">
        <h1 class="font-serif font-extralight text-5xl">Hello ✋</h1>
    </article>
{{ end }}
layouts 폴더의 index.html 파일은 홈페이지 변환시 사용된다. \
baseof.html 에 main 이란 이름을 가진 block 을 치환하기 위해 동일한 이름을 가진 define 구문을 정의한다.
define:block혹은template으로 사용할 수 있는 부분을 정의한다.
이제 테마 폴더를 벗어나 프로젝트의 루트로 이동해 정적 사이트를 빌드해보자.
pwd  # 현재 경로는 ../my-site/themes/my-new-theme 이라고 가정한다.
cd ../..
hugo -D
hugo -D 는 draft 상태의 content 를 포함하여 정적 페이지를 빌드한다는 hugo 명령어다. 위 명령어를 실행하면 my-site 의 루트 폴더에 public 이라는 폴더가 에러없이 생성되어야 한다.
public folder 는 hugo 가 빌드된 결과물이 생성되는 폴더이다.
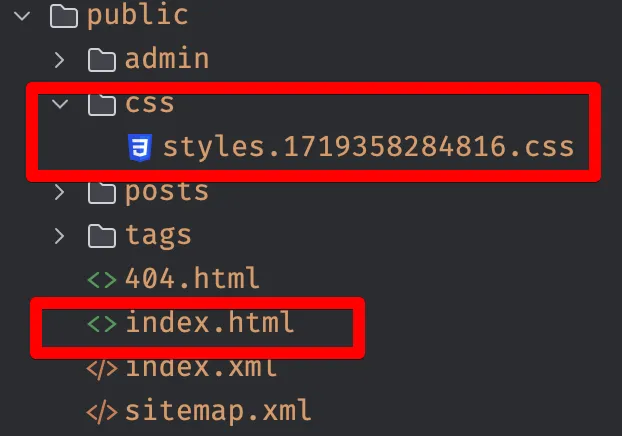
자세한 구성은 다를 수 있지만 css 폴더 와 index.html 은 있을것이다.
css 폴더에 하위의 css 파일은 tailwindcss 지시어로 선언된 파일을 postcss 처리를 통하여 브라우저가 이해할 수 있는 css 로 변환된 파일이다. \
이는 hugo 에서 지원하는 asset management 기능을 통해 layouts/partials/css.html 에 선언한 과정을 수행하는 것이다.
hugo 덕분에 번거로운 과정 없이 hugo site 빌드를 통해서 tailwindcss 처리가 가능하도록 설정했다.
서버를 실행해보자.
hugo server -D위 과정을 거치면 hugo 는 빌드 이후 서버를 1313 포트에서 실행한다.

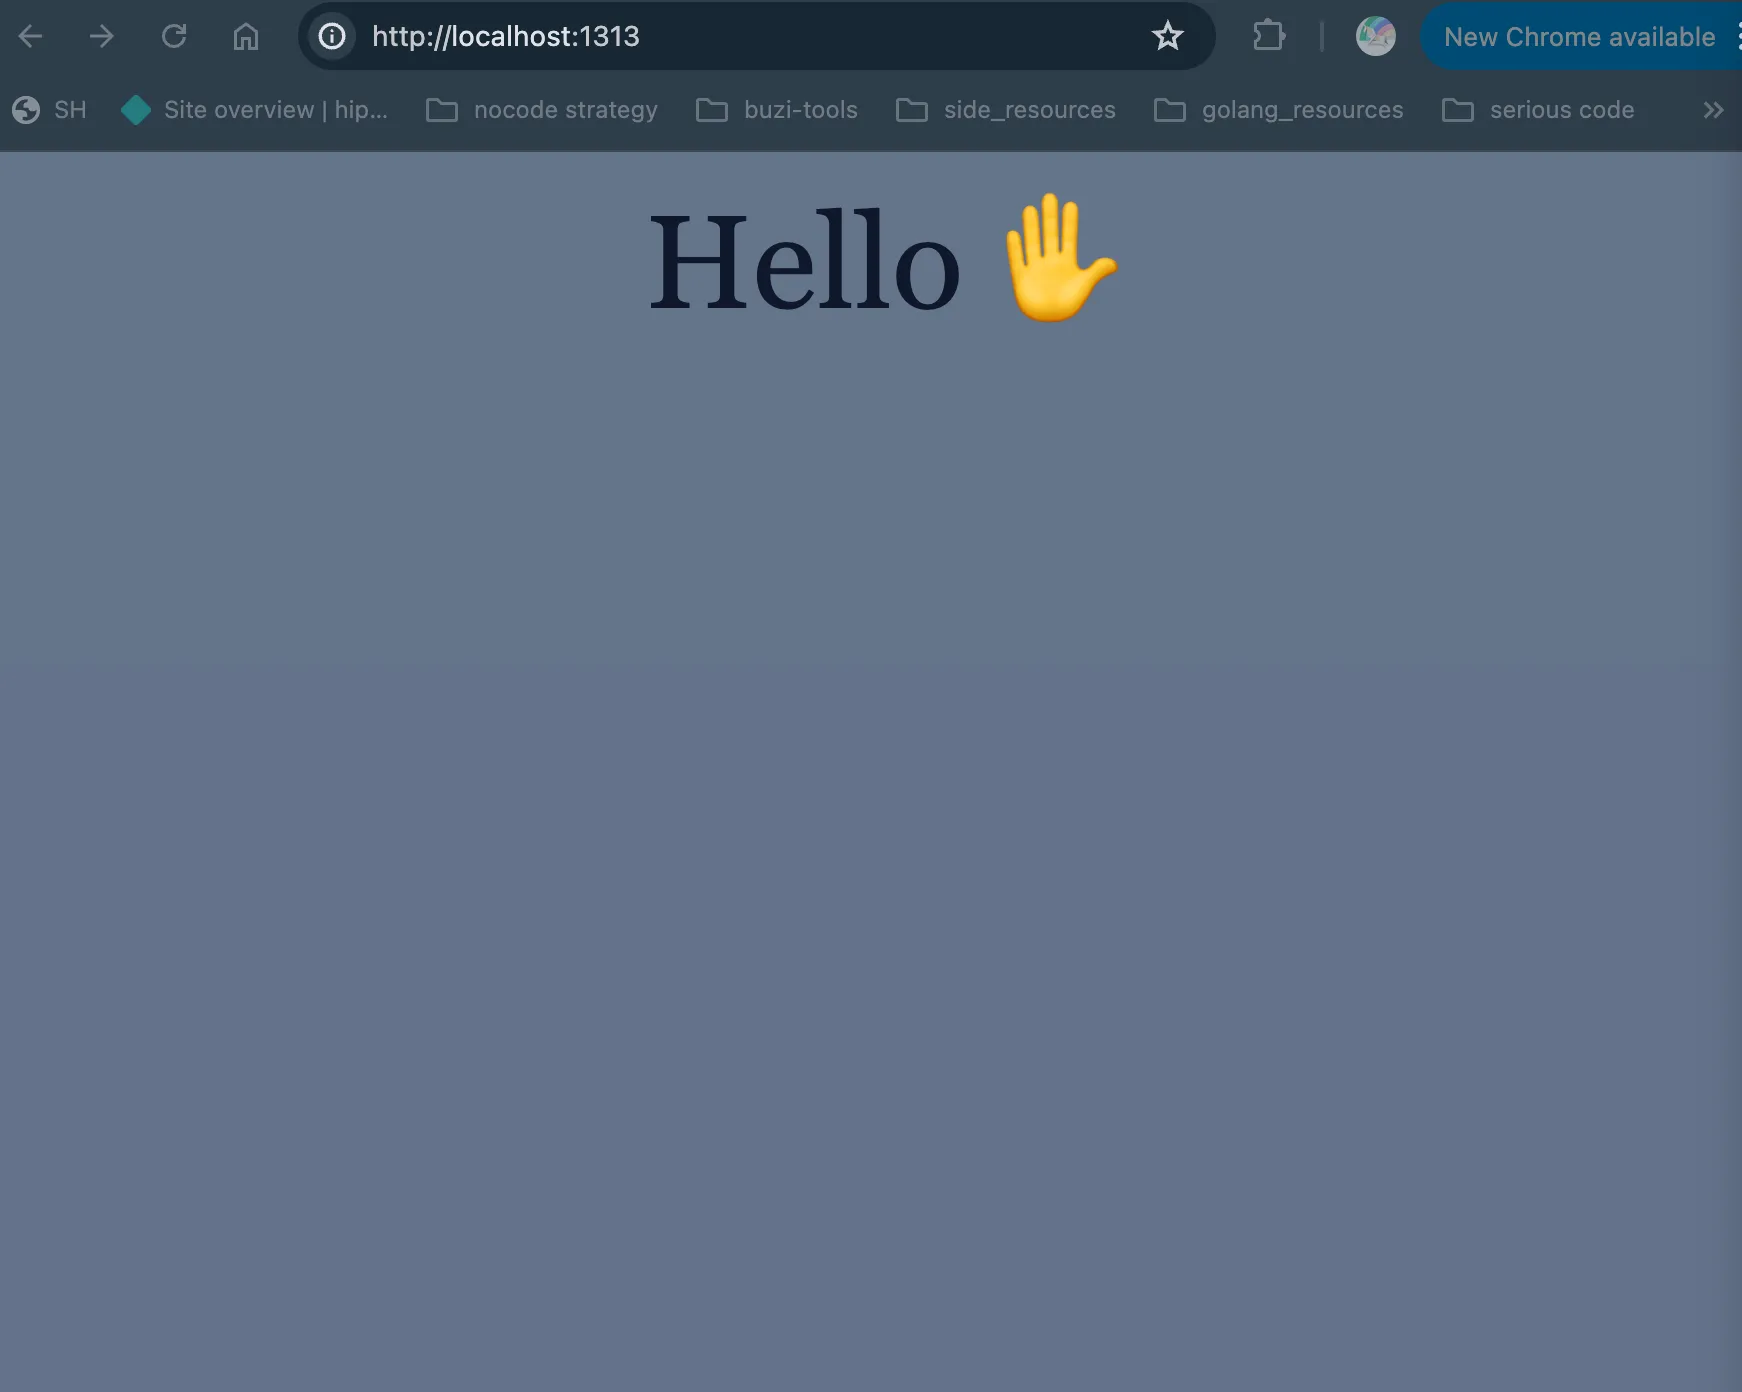
개발 모드에서 실행되었으며, 접근 가능 url 은 localhost:1313 이다.
들어가서 확인해보면 설정한 tailwindcss 가 적절하게 반영되어 있다.